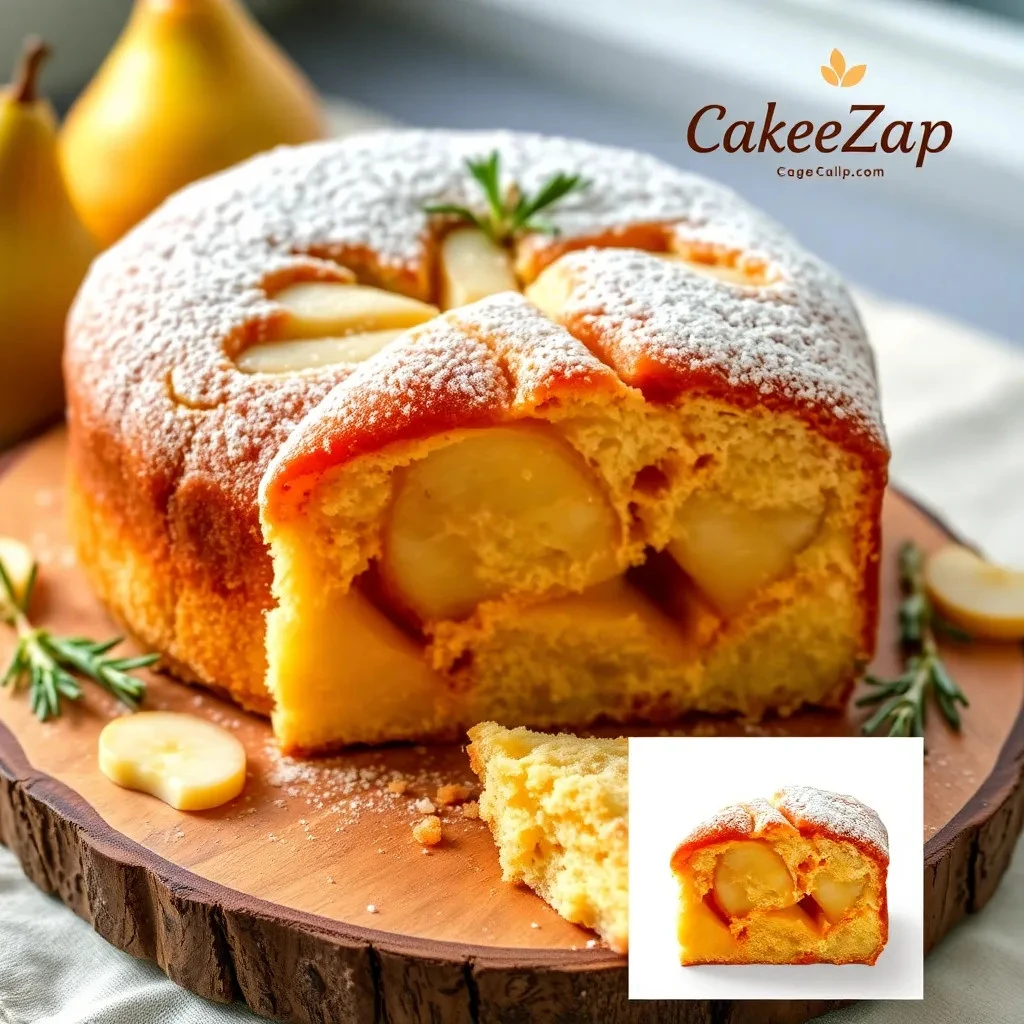
Have you been looking for a simple and delightful dessert that brings the sweet aroma of homemade goodness into your kitchen? Look no further! This Pear Cake is not only easy to make but also bursting with the natural sweetness of ripe pears. Whether you’re planning a family gathering, a weekend treat, or just want to enjoy something warm with your coffee, this cake is the perfect choice.
Why Make This Recipe
Why should you make this Pear Cake? First of all, it’s incredibly straightforward, making it perfect for both beginner bakers and seasoned pros alike. Secondly, it highlights the delicious flavors of ripe pears, which adds a fresh twist to your usual cake recipes. Plus, there’s nothing quite like the smell of a cake baking in the oven to fill your home with warmth and happiness. I remember the first time I made it for my family—they couldn’t wait to dig in! Trust me, this recipe will quickly become a favorite.
How to Make Pear Cake
Making this Pear Cake is both fun and easy. Let’s get started!
Ingredients
- 2 cups all-purpose flour
- 1 cup sugar
- 1/2 cup unsalted butter, softened
- 2 large eggs
- 1 cup milk
- 2 ripe pears, peeled and diced
- 1 teaspoon baking powder
- 1/2 teaspoon baking soda
- 1/2 teaspoon salt
- 1 teaspoon vanilla extract
- 1 teaspoon ground cinnamon
Directions
- Preheat your oven to 350°F (175°C). Grease and flour a 9-inch round cake pan to ensure your cake comes out easily.
- In a large bowl, cream together the softened butter and sugar until the mixture is light and fluffy. This process adds air to the batter, making your cake lighter.
- Beat in the eggs one at a time, making sure they are well mixed. Then stir in the vanilla extract for a lovely flavor.
- In another bowl, combine the flour, baking powder, baking soda, salt, and cinnamon. This step helps distribute the dry ingredients evenly.
- Gradually add the dry ingredients to the wet ingredients, alternating with the milk. Mix until just combined—don’t overmix!
- Fold in the diced pears. This step helps to incorporate those delicious pieces of fruit throughout the batter.
- Pour the batter into the prepared cake pan and smooth the top with a spatula.
- Bake for 30-35 minutes or until a toothpick inserted into the center comes out clean. Your kitchen will smell amazing during this time!
- Allow to cool in the pan for 10 minutes before transferring to a wire rack to cool completely.
How to Serve Pear Cake
This Pear Cake is delicious on its own, but you can dress it up if you like! Serve it warm with a scoop of vanilla ice cream or a dollop of whipped cream on top. It’s also wonderful with a sprinkle of powdered sugar or even a drizzle of caramel sauce for a special treat. Pair it with a cup of tea or coffee for a delightful afternoon snack!
How to Store Pear Cake
If there’s any leftover Pear Cake (which is rare in my house!), you can store it in an airtight container at room temperature for up to 3 days. For longer storage, place it in the fridge where it can keep fresh for about a week. You can also wrap it tightly in plastic wrap and freeze it for up to 3 months. Just make sure to thaw it in the fridge before serving again!
Tips to Make Pear Cake
- Choose ripe pears for the best flavor. Anjou or Bartlett pears work wonderfully in this recipe.
- Experiment with spices! Add a pinch of nutmeg or ginger for a different flavor profile.
- Keep an eye on your cake as it bakes. Every oven is different, so start checking at the 30-minute mark.
Variation
Want a twist on this recipe? You can try adding nuts like walnuts or pecans for an added crunch. Alternatively, replace some of the flour with almond flour for a nutty flavor. You could also swap out the pears for apples, making this recipe just as versatile!
FAQs
1. Can I use other fruits instead of pears?
Yes! This recipe also works great with apples, peaches, or even berries.
2. How do I know when the cake is done?
A toothpick inserted into the center should come out clean or with a few moist crumbs.
3. Can I make this recipe gluten-free?
Absolutely! Just substitute all-purpose flour with a gluten-free flour blend.
For more inspiring recipes, check out our Baking Basics Guide or follow us on Instagram for daily baking inspiration. Happy baking!
